I'm Janimal, happily gainfully employed Momma to a sweet girl. Livin' it up in Atlanta with a great husband and a good job. Sometimes I make stuff and here's my spot to show it off! Life is good, so I'm sharing....
Showing posts with label toddler t shirt. Show all posts

Tuesday, July 20, 2010

Toddler Pillow from Ugly Toddler Stained Shirt


Over at Little Blue Boo, there is a contest for making a child's item out of an ugly knit. I LOVE this challenge. I am SO excited about seeing what other people do (no doubt there will be more projects on my list inspired by other entries.)


So far I have three entries. Here is my first super simple toddler pillow from a stained hand-me-down TShirt!

First, the before shot of the shirt.


Not exactly "ugly" but that's because you can't see the stain at the neckline. While it's pretty cool my point and shoot camera helps camouflage stuff like that in pictures, it's hard for me to show details to you friendly blogreader folks. So you have to trust me - there is some ugly stuff on this shirt! It's also too big for Delilah and by the time it does fit her, it'll be the wrong season to wear a Summery T with a peekaboo cutout on the back.

Here is the pillow AFTER shot. Chillin on the toddler sofa with baby.


What helped make this project so simple, is that the original shirt already had a cute design on it. Complete with a fun design, cute little gem embellishments and embroidery. If it had been a plainer shirt, it would have been fun to add some little touches but the design required no further work. Perhaps next time!

From looking, many of you can probably figure out how I did this. But I know when you try something for the first time, it can still be tricky even for something simple like this. I made a mistake as I made this! Yep - such a simple little project and I still messed up. So in this tutorial I show you my mess up and my simple fix.

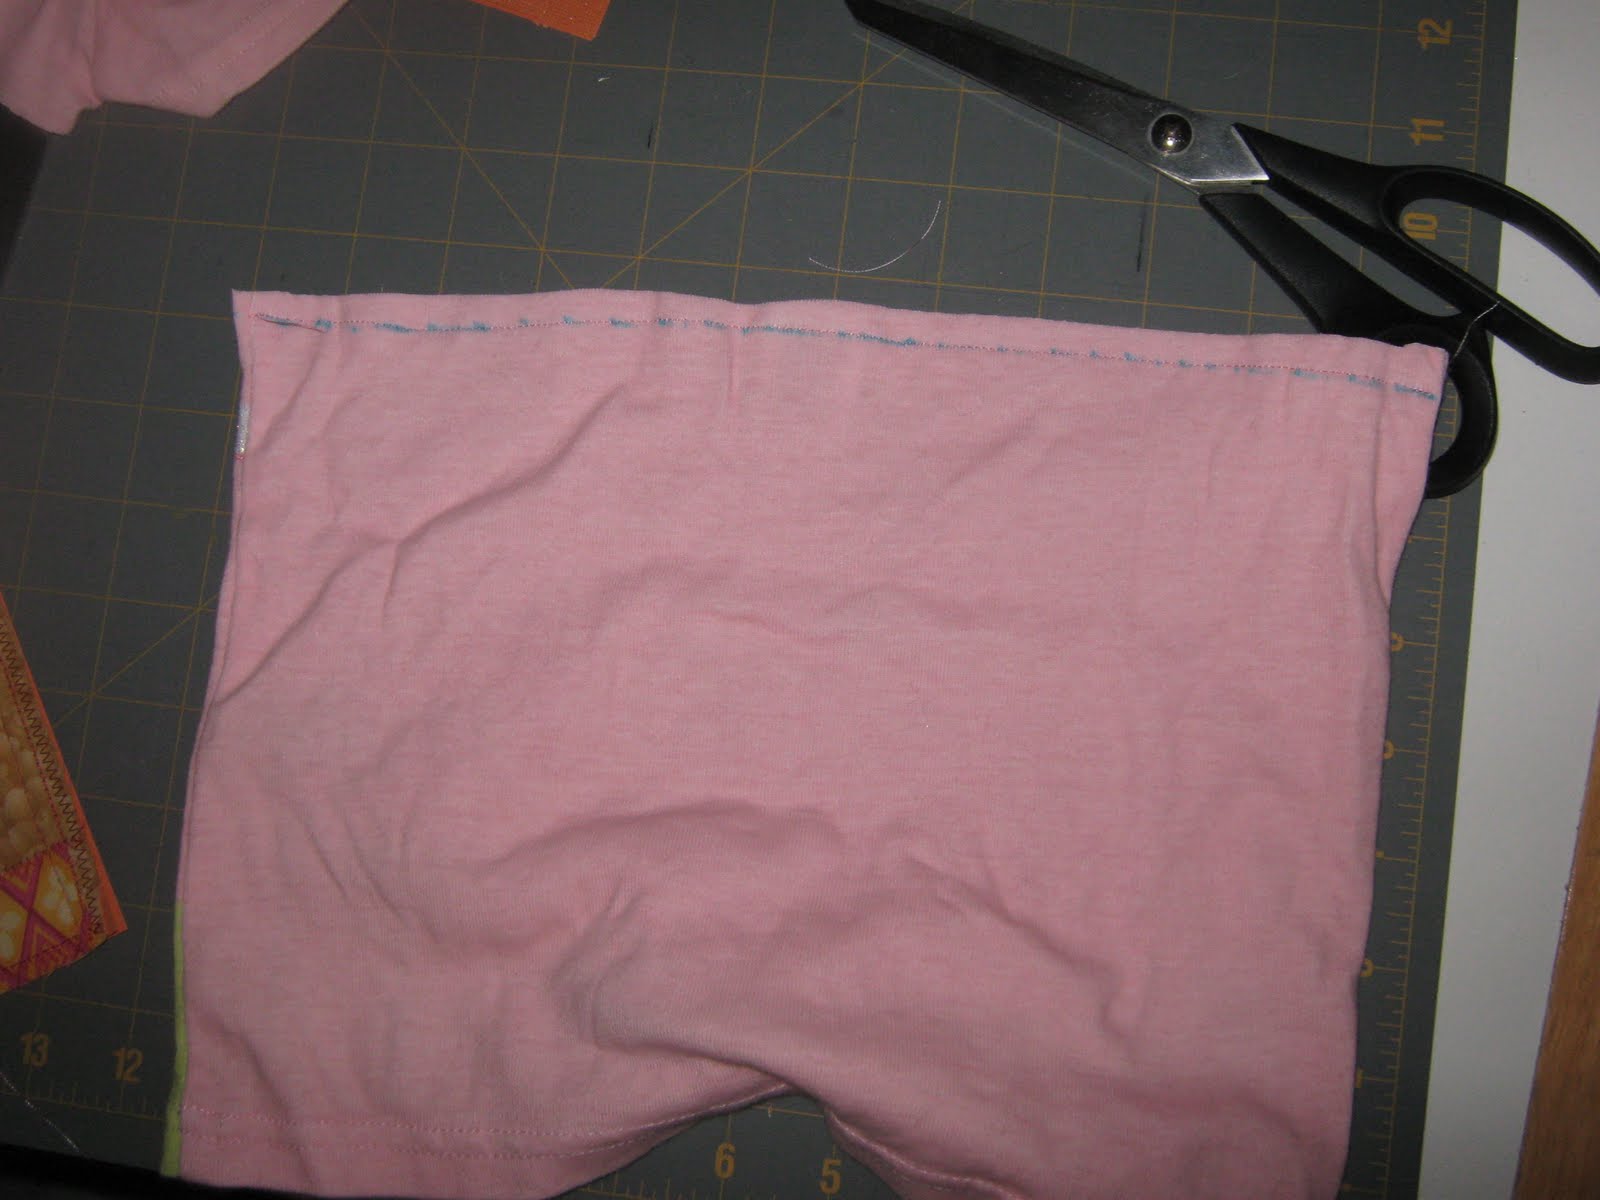
First, I drew a straight line with a fabric marker across the shirt. And....this was a mistake. What I SHOULD have done was turn the garment inside out first. Ah well, it is a mistake I was able to correct.


I used the drawn line as my guide and sewed right on top of it. The plan here is that this will be the top seam of the pillow. I'll sew the bottom, leaving an opening for turning, along the bottom finished edge of the shirt.


Then I cut about 3/8' away from the stitched line.


I then realized my boo-boo. I should have drawn the line and sewed the seam with the shirt inside out.

So what to do? I turned the shirt inside out, and sewed a new seam about a half inch away, encasing the old seam. This was an accidental french seam!


Then I sewed the bottom of the shirt a few inches on each side, leaving about a 2 inch gap for turning. I sewed right along an existing stitch line.


Then turned it!


After turning, it was time to stuff with polyfil. I tend to overstuff things - but this time I was after a nice soft pillow, so tried to be careful.


The only thing left to do was whipstitch the bottom gap closed. Because I used the bottom of the shirt for the gap, and had stitched along the existing stitch line, I had a perfect line to follow when pinching the pillow closed.


Given the very simple nature of this toddler pillow project, I don't anticipate winning a prize. I have so much faith in the vast creativity of other bloggers who will enter, that I know the winner will just blow us all away! For me, entering the contest isn't as much about winning, as it is the idea of it and the challenge to enter makes me think of doing new things. A week ago I saw this too big stained shirt and thought "oh, that was a cute shirt, too bad Delilah won't be wearing it" - but this week I looked at it and thought "OH, cool contest entry!" - and am so pleased with the result.


Delilah seemed to enjoy a little pretend night night on the pillow.


I have another ugly knit project to show you, where I have taken what might get the prize for the ugliest before pic of a weird sweater. It is now a superduper ugly hat!

The third project I am pretty proud of. I got to use fabric paint, heat n bond, andmy sewing machine to make a rad skirt for my Delilah. I'll show that off when I have a little more time to put it together AND to make sure I get pictures of Delilah wearing it.


If you see a contest online - don't think about winning. Don't think about comparing yourself to the crafty superwomen with mad skillz and their fabulous projects and professional photography. Think about how you are challenging yourself. Think about the cool inspiration you have to create something you might not have otherwise. Enjoy!


And keep in mind, should you enter, I am entering a hideous sweater turned hat that so far my 21 month year old daughter refuses to wear. I can't blame her - it's still really ugly!

Later skaters,

Janimal


Show and Tell Green


.

PonyTails and FishScales

Wednesday, March 17, 2010

Freezer Paper Stencil T Shirt

Freezer paper stencilling on TShirts for Delilah is one of my fun crafts. I've shown a few before in this blog. It's easy peasy! I haven't written a tutorial because there are already some great ones out there.

(There is a really good one here.)

The basics are, you find an image and trace it onto freezer paper (which you can buy at the grocery store). Cut the image out of the freezer paper to turn it into a stencil. Iron the freezer paper to a garment and it sticks with a great seal. Paint or blot the stencil with fabric paint (I bought some at Michaels and Walmart). Then peel off the freezer paper and TADAH!


Here is a shirt we made Delilah using freezer paper as a stencil. Daddy picked the design of course.


Too cool.
So Delilah has a collection of stencilled band Tshirts including Kiss, NIN, and Run DMC. Think her Father's taste in music will rub off? Hmmmm....I may have to put some thought into this and make some shirts with The Beatles stuff on them!

Saturday, March 13, 2010

Lazy Days Skirt and Applique Top

Ahem, you wanna see someone cute?


They don't get much cuter than this!


Delilah is sporting the first Lazy Days Skirt I made for her. With a top I appliqued with fabric to match. If there is a little girl in your life you want to sew for, this skirt pattern is a breeze. Honestly, it is super easy, and sews up fast. I have been sewing up quite a few for D to wear over the Summer months. I even bought a pattern to try and make some matching tops, but I am a bit scared of it! The skirt is just sewing a few straight lines -- a top, has, like, curves and stuff. So far I have been trying my hand at appliqueing ready made shirts.


This shirt was also my first shot at applique. First I embroidered a "D" onto the fabric, then cut around it in a circle. I cut a piece of fusible web the same size, and used it to iron on the circle. I then set my machine to a zigzag stitch and stitched around the circle. I'm not confident my zigzag stitch was exactly in the right place and would hold the applique, but hopefully the fusible web will hang in there.

We think this is a good outfit for sitting on the floor and reading books with Mommy.


(Ahem, that dress does cover all the appropriate parts, it's just hiked up for sitting on the floor. )


Also a good time to give Mommy a make-over.


I am so lucky to be this little girl's Mom. :-)

Tuesday, February 9, 2010

Delilah models and some stuff I've sewn


I really have meant to update this blog more often, but like with most things in my life, it's tough to maintain consistency.
As previewed in my last post, here's a shot of the NIN shirt made with freezer paper modelled by my pretty girl.
Image and video hosting by TinyPic


((Way cute if I say so myself.))

Perhaps this blog will turn out to be a craft blog after all. Perhaps it will be fun one day to look back on my projects and see a progression in my skills. At least, I can hope they progress! I recently joined a sewing group and will go to my first meeting this week. I would call myself an "advanced beginner" when it comes to sewing. I've made simple things like pillows and bibs, but have stayed away from stuff that scares me, like clothing! But I want to do more.

Lately I have been into sewing toys. I found the Black Apple Doll from Martha Stewart's website and made a few for Delilah. For other novice sewers out there, it's a simple and easy pattern, and very satisfying to make. Also, I ordered some wool felt and have been working on a handsewn felt doll and made a few birdies. I'm planning on making some felt food for Delilah to play with. There are TONS of good ideas for felt food out there.

Here is a pic of one of my attempts at the Black Apple Doll - this is spacedoll (with a skinny pink version in the background). (Make your own by following the pattern here.)


For skinny pink doll, I had just downloaded the pattern, and used scraps and a needle and thread to handsew a doll while visiting my Father-in-law over Thanksgiving. No polyfil was available so I used cotton balls!! Delilah loved the doll and it was a labor of love - but ohhhh it was so much easier to run the pattern through my sewing machine instead of all that handstitching!

As for felt crafting, here is the "bluebird of happiness". I stitched him while watching Boise State win the Fiesta Bowl. GO BRONCOS! I drew a simple birdie on paper, then cut him up as a pattern on wool felt, then handsewed him together in between plays. He's happy because Boise won! Since then he has been joined by a yellowbird friend, but she's been a bit camera shy so just bluebird here today. And a pic of the pattern I drew below.


(And again, please forgive my photography skills. A new camera is on my wishlist, but a new camera means learning how to use it - which takes time I am not ready to commit.)