I'm Janimal, happily gainfully employed Momma to a sweet girl. Livin' it up in Atlanta with a great husband and a good job. Sometimes I make stuff and here's my spot to show it off! Life is good, so I'm sharing....
Showing posts with label atlanta sewing store. Show all posts

Thursday, January 27, 2011

A Wee Doggy

Hello Friends.

Delilah has been accessorizing a lot lately. She loves to put on her necklaces and bracelets. So I decided to add to her collection by sewing a little necklace pendant.


This little guy is from a sweet pattern in the book Wee Wonderfuls. The Doxie necklace. Not only does D like necklaces, but she loves doggies. So it wasn't just luck that she likes this little guy~!

The pattern calls for using rickrack but when I made it, had none on hand, so I just used plain white ribbon. My NEXT one will have cute rickrack! The fabric is a little scrap of French General from my stash.


There is a lovely FlickR group HERE to see other peeps projects from the book. Check it out! If you want a preview of what to expect from the book, here's a link to my post on the mermaiden pattern from the book, with a link to the FREE download of that pattern on Martha, so you can make your own!

Thanks for stopping by,

Janimal


make it wear it


Monday, January 10, 2011

Ruby Star Rising Dress For Delilah

I have LOTS of projects in the works -- all put on hold because of the arrival of this:


Yeah Baby! That's Ruby Star Rising! A fabulous fabric line by Kokka designed by Atlanta artist Melody Miller. Local shop Whipstitch fabrics sold out within 48 hours! I bought some from them and also managed to make online orders at Purl Soho and FabricWorm. (By the way, FAST shipping from FabricWorm. Nice!)
I just HAD to make something right away! But it's so hard finding the right project for fabric that is SO awesome.

Of course, Delilah had to have a Ruby Star Rising garment of some kind.
So, here it is, the Ruby Star Rising Dress.


This print in the line is called "Ephemera", and includes bits and pieces that appear in the other fabrics in the line. Check out those awesome viewfinder reels and pretty teacups!

The back of dress is pretty cool too....


It took me a loooooong time to choose the buttons! I settled on these peach ones to try and maintain the retro feel of the dress. The lining is linen from Fabric.com.
I'm pretty proud of myself for matching up the side seams like this.


To get the other side seam matched would have required cutting into another yard/panel. This is pricey stuff, so I made do and I think it looks just fine.
Delilah really wants to model this for you, but right now, here is a more appropriate outfit for her:

SO much snow in Atlanta! She's bundled up like Randy from A Christmas Story. Not a good day to wear a linen/cotton dress. Hopefully she can wear this to a party next weekend (with some nice comfy layers underneath) so I can show it off on my cutiepie. That gives me a few days to come up with the right accessories!


She managed to sneak a snowball into the house! She
sweetly offered me a bite. Snow has no calories, you know.

The dress pattern is Madison by Bonnie Blue. This very simple pattern is becoming kind of a "go to" for me to show off my favorite fabrics. It's just a simple A line jumper, which showcases pretty fabrics without overwhelming my little model.

I have other garments to show you though! I actually do manage to sew other garments with design details! Please visit here again! Besides some shots of my little model in this dress, I hope to show you a couple other Oliver and S items, and post progress of my camo dress.
Please stop by again soon!
Janimal


Today's Creative Blog

http://vintagepollyanna.blogspot.com/


make it wear it


Friday, September 10, 2010

Changing The Hat

Hello Blogland! Today I am happy to show you how I customized a hat for my girly girl.

Recently, I found this hat at Kohls. Armed with my 30% off coupon, it was mine at a bargain price.


Although I wasn't a big fan of the black buckle detail, I liked the texture of the fabric, and I thought Delilah would look adorable in that shape hat -- if I fixed it up a bit.

Here's Delilah chilling out waiting for a real photographer to take her picture, sporting her transformed hat, now featuring a flower that matches her shirt. Eating Cheerios of course.


The best part - the flower is attached with Velcro, so her hat can be customized for other outfits!
The shirt and main hat fabric is Travel England in turquoise by Kokka, with a Michael Miller Graceful Vines print for the lining and contrast in the flower. Both purchased from the lovely people at Some Art Fabric. I made the pants too. Nice and soft pique knit. Next time I may make some for me!

(My tutorial to make this simple shirt is HERE)

Notice the hat has a center covered button detail? HA! That's not a button. Let me me show you how......

First, I made a fabric flower - you can see my tutorial on that here. Instead of a button for the center, I decided to make a covered fabric button for the center. Except I had no fabric covered button supplies. I improvised. You can too!


Supplies:
Fabric flower, cardboard cut into a circle, small piece of batting slightly larger than the cardboard circle, fabric square, and strong glue.


Glue the cardboard to the batting.


Wrap the fabric around the circle, using dabs of glue to hold in place on the back.


Let the center button dry before gluing to the center of the fabric circle.


The black buckle detail on the hat was easily picked off.
I sewed velcro the back of the flower, and to the hat, so this flower comes off to easily customize the hat for other outfits.


Thanks for stopping by. Your feedback is so lovely.

- Janimal


make it wear it

Tuesday, July 20, 2010

Toddler Pillow from Ugly Toddler Stained Shirt


Over at Little Blue Boo, there is a contest for making a child's item out of an ugly knit. I LOVE this challenge. I am SO excited about seeing what other people do (no doubt there will be more projects on my list inspired by other entries.)


So far I have three entries. Here is my first super simple toddler pillow from a stained hand-me-down TShirt!

First, the before shot of the shirt.


Not exactly "ugly" but that's because you can't see the stain at the neckline. While it's pretty cool my point and shoot camera helps camouflage stuff like that in pictures, it's hard for me to show details to you friendly blogreader folks. So you have to trust me - there is some ugly stuff on this shirt! It's also too big for Delilah and by the time it does fit her, it'll be the wrong season to wear a Summery T with a peekaboo cutout on the back.

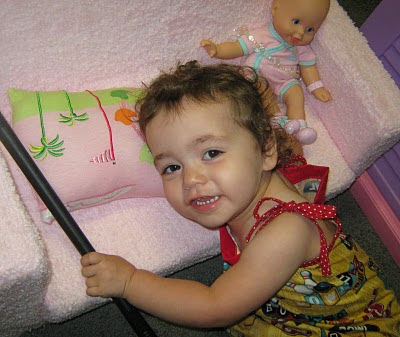
Here is the pillow AFTER shot. Chillin on the toddler sofa with baby.


What helped make this project so simple, is that the original shirt already had a cute design on it. Complete with a fun design, cute little gem embellishments and embroidery. If it had been a plainer shirt, it would have been fun to add some little touches but the design required no further work. Perhaps next time!

From looking, many of you can probably figure out how I did this. But I know when you try something for the first time, it can still be tricky even for something simple like this. I made a mistake as I made this! Yep - such a simple little project and I still messed up. So in this tutorial I show you my mess up and my simple fix.

First, I drew a straight line with a fabric marker across the shirt. And....this was a mistake. What I SHOULD have done was turn the garment inside out first. Ah well, it is a mistake I was able to correct.


I used the drawn line as my guide and sewed right on top of it. The plan here is that this will be the top seam of the pillow. I'll sew the bottom, leaving an opening for turning, along the bottom finished edge of the shirt.


Then I cut about 3/8' away from the stitched line.


I then realized my boo-boo. I should have drawn the line and sewed the seam with the shirt inside out.

So what to do? I turned the shirt inside out, and sewed a new seam about a half inch away, encasing the old seam. This was an accidental french seam!


Then I sewed the bottom of the shirt a few inches on each side, leaving about a 2 inch gap for turning. I sewed right along an existing stitch line.


Then turned it!


After turning, it was time to stuff with polyfil. I tend to overstuff things - but this time I was after a nice soft pillow, so tried to be careful.


The only thing left to do was whipstitch the bottom gap closed. Because I used the bottom of the shirt for the gap, and had stitched along the existing stitch line, I had a perfect line to follow when pinching the pillow closed.


Given the very simple nature of this toddler pillow project, I don't anticipate winning a prize. I have so much faith in the vast creativity of other bloggers who will enter, that I know the winner will just blow us all away! For me, entering the contest isn't as much about winning, as it is the idea of it and the challenge to enter makes me think of doing new things. A week ago I saw this too big stained shirt and thought "oh, that was a cute shirt, too bad Delilah won't be wearing it" - but this week I looked at it and thought "OH, cool contest entry!" - and am so pleased with the result.


Delilah seemed to enjoy a little pretend night night on the pillow.


I have another ugly knit project to show you, where I have taken what might get the prize for the ugliest before pic of a weird sweater. It is now a superduper ugly hat!

The third project I am pretty proud of. I got to use fabric paint, heat n bond, andmy sewing machine to make a rad skirt for my Delilah. I'll show that off when I have a little more time to put it together AND to make sure I get pictures of Delilah wearing it.


If you see a contest online - don't think about winning. Don't think about comparing yourself to the crafty superwomen with mad skillz and their fabulous projects and professional photography. Think about how you are challenging yourself. Think about the cool inspiration you have to create something you might not have otherwise. Enjoy!


And keep in mind, should you enter, I am entering a hideous sweater turned hat that so far my 21 month year old daughter refuses to wear. I can't blame her - it's still really ugly!

Later skaters,

Janimal


Show and Tell Green


.

PonyTails and FishScales