
I have a tutorial today! A pretty flower hairclip tutorial!

I love the felt rose hairclip tute on PurlSoho.com here. I actually have made their version of a felt rose and worn it myself as a pin.
The felt rose I am going to show you is a little smaller than the Purl version. I found that on Delilah's fine hair, a heavy hairclip doesn't stay in place as well. This little flower is smaller and lighter, and very easy to do. It does require a needle and thread, but I suppose it really could be done with glue.
So away we go!
Start off with a circle of wool felt. About 2' in diameter.

Cut the circle around in a kind of corkscrew manner. About a quarter inch thick curl.


At this point, thread a needle with embroidery floss. I like to use a double thickness and tie the end with a nice thick knot.

Take the outermost point and roll it up a little. Then push the threaded needle right through the back.

Push the needle back through at a different angle, holding the rolled piece together. Then keep rolling.

After you've wrapped the rose up a little more, do a few more stitches in the back of the flower, from a few different angles, holding it all together.

When you get to the end, put the flat center circle flat on the back and sew or glue it in place.

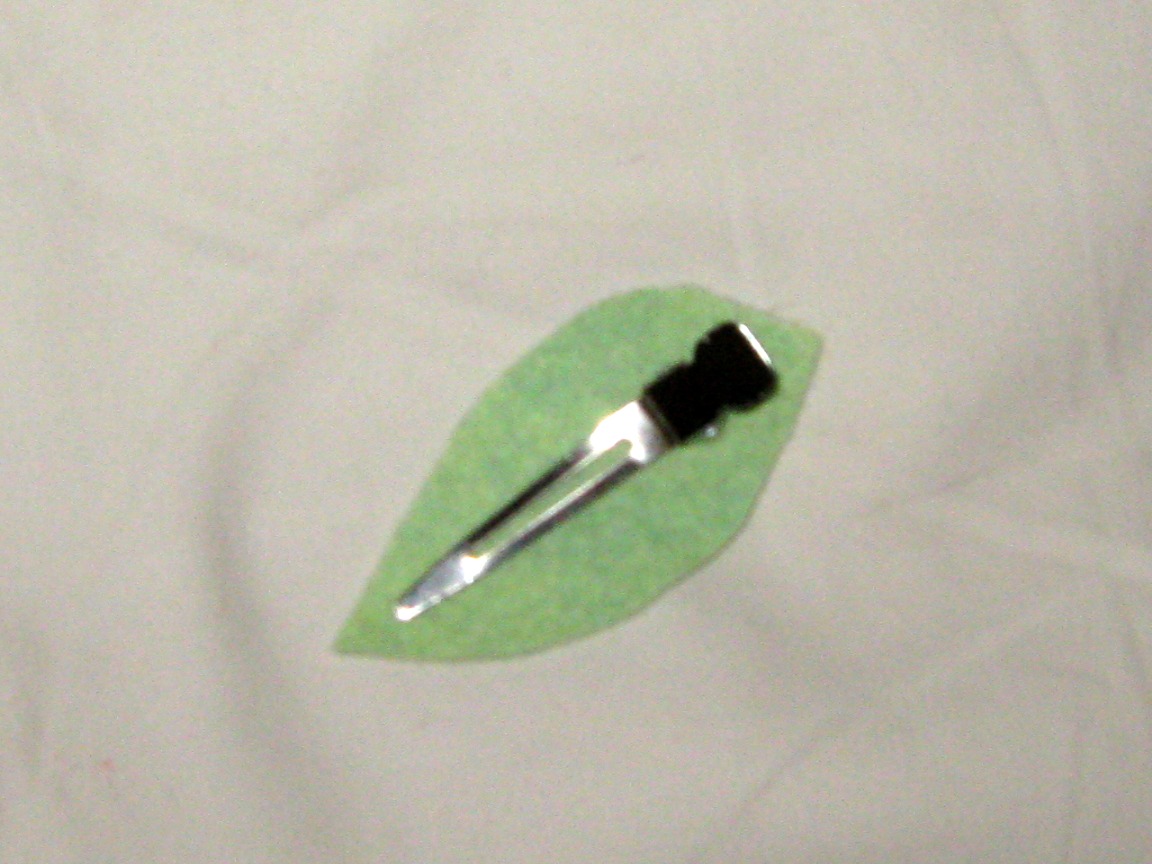
Ok! Flower done! Now let's have a leaf on our clip!
Cut a leaf shape just bigger than your clip.
You can simply glue the leaf in place, glue the flower on top, and be done!
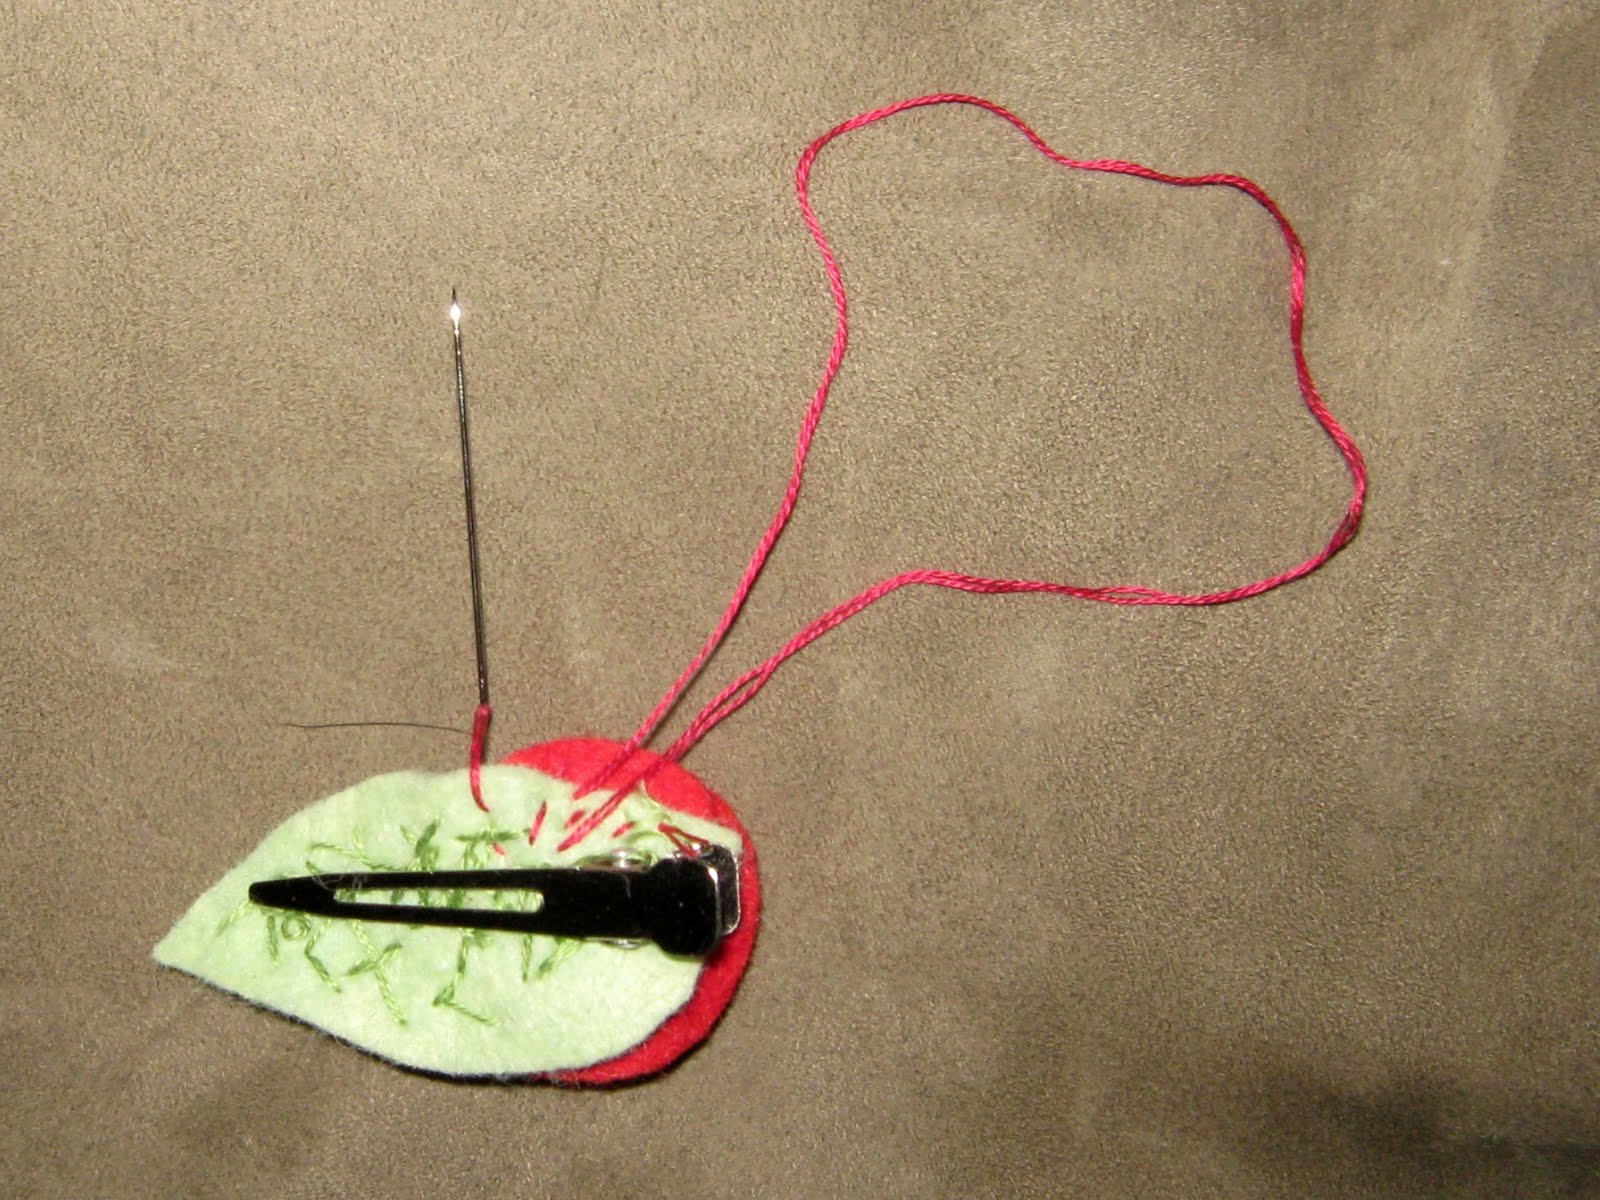
I wanted to add some detail to the leaf and decided to embroider them with darker shade of green thread. You can stitch the detail on and then glue to leaf to the clip, but I thought I would use those stitches to keep the leaf firmly attached to the clip instead of using glue. So as I sewed the detail on the front (top) of the leaf, I wound the needle through and around the clip, holding it in place.


Eventually the leaf was attached to the clip by my stitches and it had a nice detail on top.


Now all that is left, is putting it together!
I suppose I could have glued the rose to the leaf, but I decided to stitch it together.
I also did a few more stitches through the hole in the clip, for a little more reinforcement.

Now, the flower and leaf are all stitched together to the clip. But I think as a finishing touch, I will add a little glue over the stitches to give it a little extra reinforcement. And....next time I do this, I might wrap some ribbon over the top of the clip first, so you don't see as much of the metal clip. A small detail as you don't really see it.
And there you have it! A cute felt flower clip for a cute girl. She wasn't available to model this when I finished it, so here is a bad picture of the clip in my hair. Holy camera flash Batman!

It will TOTALLY be cuter on Delilah!
In other news.....I finished my camo dress! Well, I still have to sew the belt, but the dress itself is finished. And it fits! Well, sort of. I'll make some adjustments to the pattern for next time. I'll tell you all about that in an upcoming post.
Take care y'all!
Janimal


These are awesome. I'm going to make some tonight for my niece's birthday party.
ReplyDeleteThat clip is so cute! I may have to make some for my youngest. I'll have to adapt it to go on a barrette rather than a clip because she has a ton of hair!
ReplyDeleteI found your blog in a search, and then realized that you are in GA too. Hi, neighbor!
Sandra
Appreciate this bblog post
ReplyDelete